I’ve been working on a new illustration for a children’s story I wrote called “The Big Mean Cat”. As I stated in my previous blog, I’ve never been published in fiction, and I’ve never tried to make illustrations–what was I thinking? I have done some arts and crafts (you can see some of my efforts on my decorative painting website and my craft blog ), but I’m finding creating all these colored pencil drawings difficult and tedious.
Below, I’ll show you why, despite putting a lot of effort into this colored pencil drawing, I’m still having to consider tossing it and starting over.
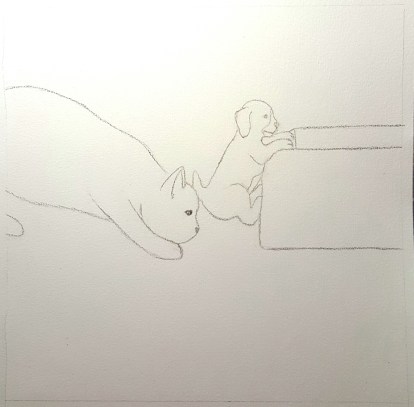
The first picture below is my drawing. I started with a #2 pencil and did a lot of sketching, erasing and re-sketching. I wasn’t totally pleased with either the cat or the puppy that he’s shoving into the pet bed, but after a lot of fiddling, it was the best I could do. I darkened the lines of the drawing with a dark gray colored pencil.
In this next photo, I’ve put down the first light layer of color. It’s at this point in every picture where I always come to the conclusion that my skill is that of a not-terribly-talented elementary school age child and I should just give up now. I do my best to ignore that internal editor voice and keep going.
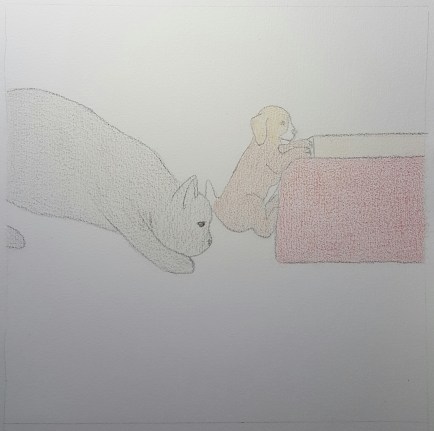
Below, I’m intensifying the colors. I’m using different shades of red on the pet bed, and different shades of gray and even some blue in that cat’s fur. Hmm. It still looks rough.

After adding more color to my picture, I got out odorless paint thinner and a couple of small brushes, and blended my colors. I’m so glad that I found a video on YouTube about this technique. Now we’re getting somewhere!
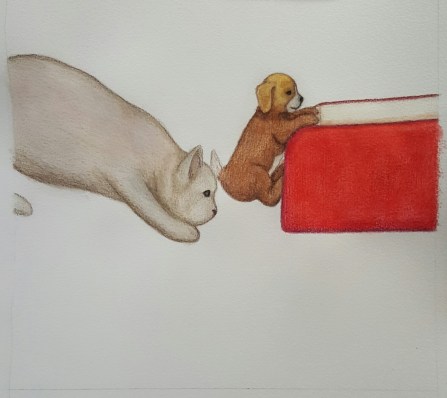
One of the things I just started doing with my last couple of drawings is using chalk pastels to fill in the background. They blend so much more easily than the colored pencils in a large area.
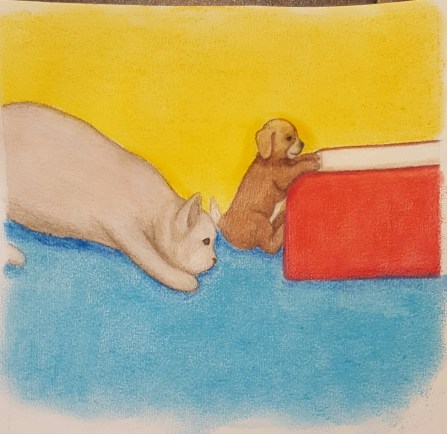
Oh no! What are those shadows around the puppy’s head, and why did the pastel get all dark and blotchy under the cat’s belly?
I figured out that the paint thinner seeped into the paper beyond the outlines of my animals (and yes, I did wait until it dried to use the pastels). It seems to have made the paper in those areas react differently.
I still have finishing touches I want to do on the eyes (put in highlights), and work on creating more depth in the fur on both animals. But I’m not sure if I should move forward, or toss this and start over.
I decided to work on it a little more. I deepened the colors just about everywhere (still need to put the eye highlights in), and after I took the picture, I increased the saturation of the colors still further on my computer. I have figured out recently that this can do a lot to make my colored pencil drawings look better.
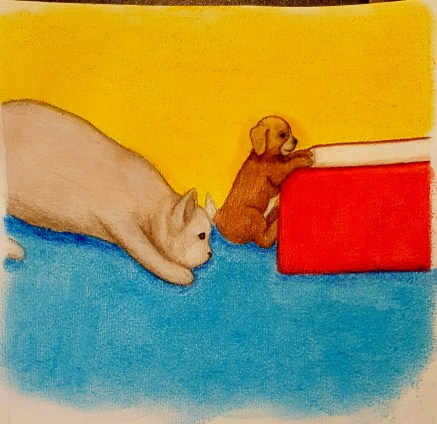
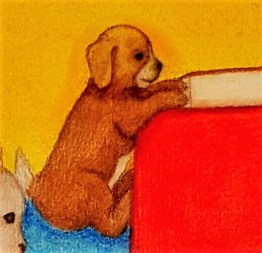
Sigh. It still looks bad. My daughter, who has a degree in graphic design and a Mac computer with great software could probably clean this up for me (she’s offered to help when it comes time to put pictures and words together, and submit it to CreateSpace). But even with all of that, I don’t think she can fix all that is wrong with this picture–like the fact that this puppy looks younger than the puppy in my previous picture (see my first blog post).
So aggravating. Oh well, back to (literally) the drawing board…

Wow, looks really great ! What a work in progress !!
LikeLike